Sequences tab
Use the Sequences tab to create and manage your sequences.
The following options are available:
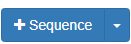 | Click to display the Sequence dialog, which enables you to create a new sequence. |
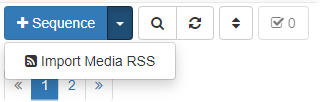
 | Click the arrow at the side of the Add Sequence button to access the Import Media RSS dialog, which enables you to create a sequence by importing images and videos from a remote Media RSS address. |
 | Click to display the search field and a dropdown menu. These menus enable you to control which items and columns are displayed in the list.In the dropdown menu, you can select a specific group to restrict the list to displaying only user items associated with that group. |
 | Click to refresh the list of sequence items. |
 | Click to sort the order of the created sequences by date created, date modified, or by label. |
 | When you have one or more sequences selected, click this button to display the Multiple selection dialog. Use this dialog to set permissions, add sequences to a group, and control access to all selected sequences. |
 | Click to open the library at the side of the screen. This enables you to easily drag items from the library into a sequence or add new items to the library. |
 | Click to expand a Sequence item and display its content. When a sequence item is expanded, you can add or remove content and configure its settings using the Sequence dialog. |
| a=b | Click to display the Set test data dialog. This enables you to set the value of variables so you can test which items are active when specific conditions are met. Active items will display a green dot. |
Sequences
Click the Open sequence button ( ) on a sequence item’s header to expand a sequence and view its content.
The sequence header
When expanded, the following options are available on the sequence item’s header:
![]() — Click to undo a previous action.
— Click to undo a previous action.
![]() — Click to redo an action you’ve undone.
— Click to redo an action you’ve undone.
![]() — These boxes display the total duration and total storage space required on the playback device to store the sequence.
— These boxes display the total duration and total storage space required on the playback device to store the sequence.
 — Click to display the sequence options menu which enables you to edit, preview or view data about the sequence.
- Settings — Select to display the Sequence dialog and edit sequence properties such as the label or type of sequence.
- Preview — Select to preview the sequence. The preview opens in a new browser tab.
- Simulate — Select to open the Reports > Playback simulator page to see a list of how the items will be displayed. This is useful when testing conditions an inner sequences.
- Media RSS — Select to view the sequence as a media RSS Feed. The RSS Feed can be used to import a list of content into other systems or view in an RSS Reader.
- Remove expired — When you import an item into a sequence, you can set an End date. Click to remove expired content from the sequence.
- Remove — Select to open the Remove item dialog.
- Click Remove to revoke your user access from a sequence item. This does not remove the sequence from the system. The sequence will remain visible if it is a member of a group you also have access to.
- Click Erase to remove the sequence from the system. You will not be able to recover the sequence item.
- Copy — Select to create a copy of the sequence. The Sequence dialog is displayed so you can apply a new label and reconfigure the settings as necessary.
- Item map — Select to display an item map for the sequence. The item map is useful when a sequence contains inner sequences.
- Dependencies — Select to view any sequences used by the selected sequence, and any sequences that use the selected sequence. Dependencies are displayed in the Dependencies dialog.
- Display summary — Select to open the Reports > Display summary tab.
- Display report — Select to open the Reports > Display report tab.
- Item history — Select to display the Reports > User action report tab.
 — Click to close the sequence item so its content is hidden in the list.
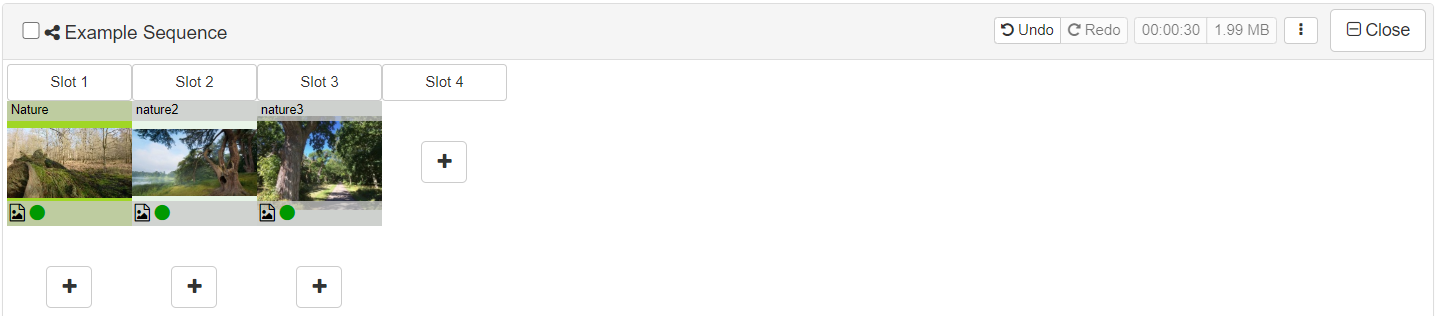
The sequence item content
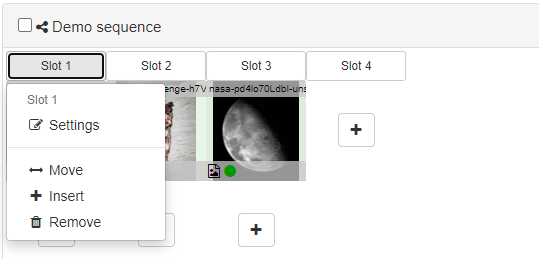
 — Sequences are divided into slots. Within each slot, you can stack content or add inner sequences that will play depending on whether specified conditions are met. Click the slot header to display the Slot menu.
- Settings — Click to display the Slot dialog, which enables you to configure how the stack operates.
- Move — Click to move the slot to the left or right in the sequence.
- Insert — Click to insert a new slot to the right of the selected slot.
- Remove — Click to remove the selected slot.
Note: making changes to slots could cause stack misalignment if the sequence is used as a base.
 — Click to add a new item to the sequence. The Stack item dialog is displayed.
 — Click to edit individual library items. To display this button, move the cursor over an item. The following options are available:
- Edit — Click to display the Stack item dialog.
- Preview — Click to preview the item in a new window.
- Expire — Click to add an End date to the item and mark it as expired. This will prevent the item displaying.
- Reactivate — Click to remove the End date and reactivate the item. This option is only available if an item is expired.
- Remove — Click to delete the item from the sequence. It remains in the Library.
- Copy — Click to create a copy of the item. The Paste item icon (
 ) is displayed in the places the item can be copied to.
 - Find Library item — Click to open the Library tab and locate the item.
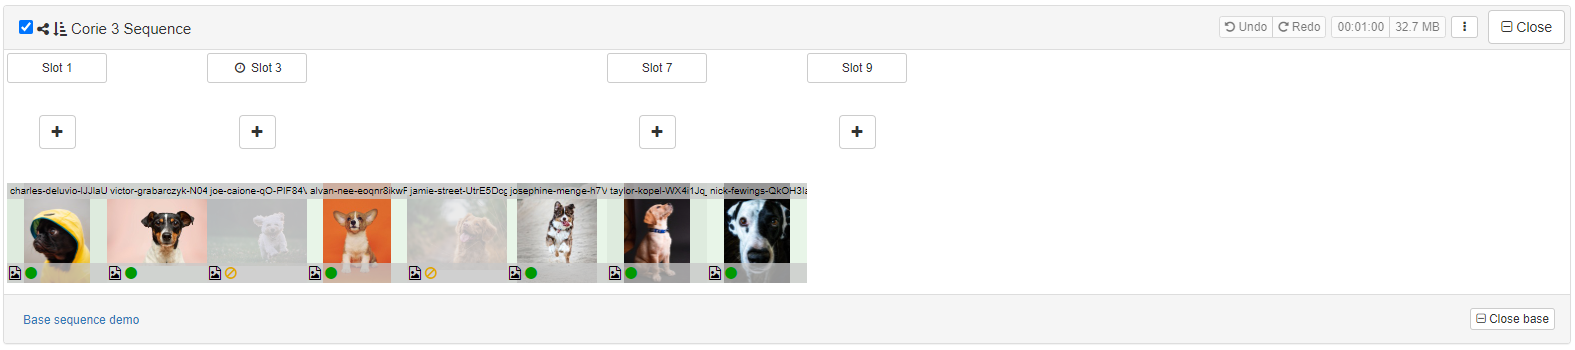
 — Click to open the base sequence. The base sequence is displayed beneath the selected sequence. This button is only visible if the selected sequence is using another as a base.
Sequence dialog
Use the Sequence dialog to create and configure a new sequence item or edit an existing one.
To display this dialog, on the Sequences tab:
- click the Add Sequence button (
 ) ; or
 - click the Options button (
 ) on a sequence item and select Settings.
The following tabs are available:
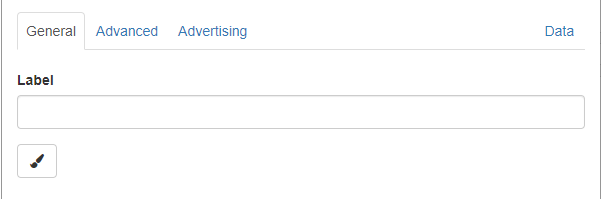
General
Enter a label and specify a type for the sequence.
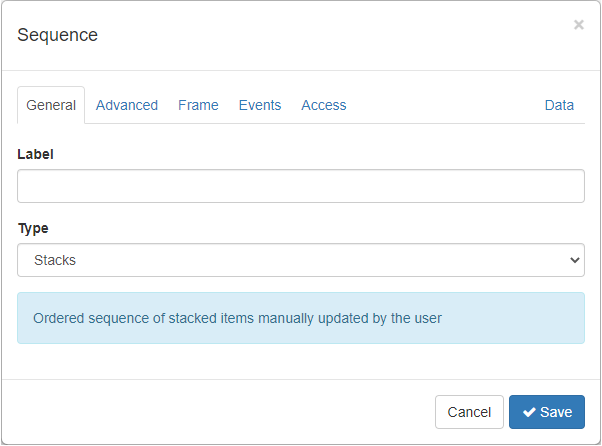
Label — Enter a name for the sequence item. This will enable you to identify it.
Type — Select a default type for the sequence.
- Stacks — Create an ordered sequence of stacked items manually updated by the user.
- Stacks shuffled — Create a sequence of stacked items manually updated by the user and randomly shuffled at the beginning of each loop.
- Stacks on a shared base — Create a stack on a base sequence. Select the base sequence from the Base sequence dropdown list.
- A base sequence provides default items for display. These items can be overridden by stacking on top. The base sequence controls which slots can be overridden and the maximum duration of slots. Multiple sequences can be stacked and shared, supporting a hierarchy of control that is ideal for international, regional, and local advertising campaigns spanning thousands of screens.
- Schedule — A sequence with only one stack of items that define time blocks. Allows a time period to be divided into months, days, hours etc.
- Populated by Ad Server — Create a sequence populated by an Advert server that provides one or more adverts. See Video Ad Serving Templates (VAST).
- Populated by Media RSS Feed — Create a sequence populated with images and videos read from the Media RSS source entered in the Media RSS address field. It updates automatically when it is accessed.
- Populated by email — Create a sequence populated with images and videos sent to the specified email address. The item ID will be generated after saving. Save then edit this item again to view.
- Populated by VAST — Create a sequence populated by fetching a Video Ad Streaming Template.
- Advert pool — Experimental feature for allowing a sequence to be populated by an anonymous user.
Advanced
Configure advanced sequence settings.
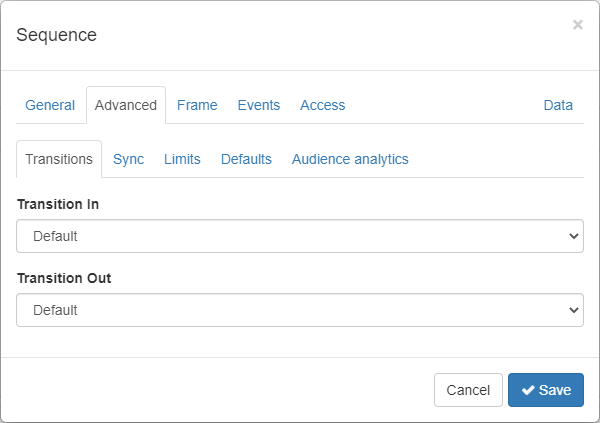
Transitions — Select this tab to display options that enable you to configure transition animations to provide visually pleasing movement between items in a sequence.
Sync — Select this tab to display options that enable you to synchronise playback between local devices. Screens must be on the same LAN and configured to display the same sequence or root base sequence. Ensure display candidates in each slot have the same duration. Synchronisation requires devices to have downloaded all content and may take a few minutes to apply. See Playback Synchronisation for more information.
Limits — Select this tab to display options that enable you to set the maximum number of slots for the sequence.
Defaults — Select this tab to display options that enable you to set the default duration for new items.
Frame
Add a frame to the sequence. A frame may position or scale the main content and enable you to provide additional information at the sides. A frame can also be used to overlay branding on the main content.
Click Show sequence frame to access the frame settings.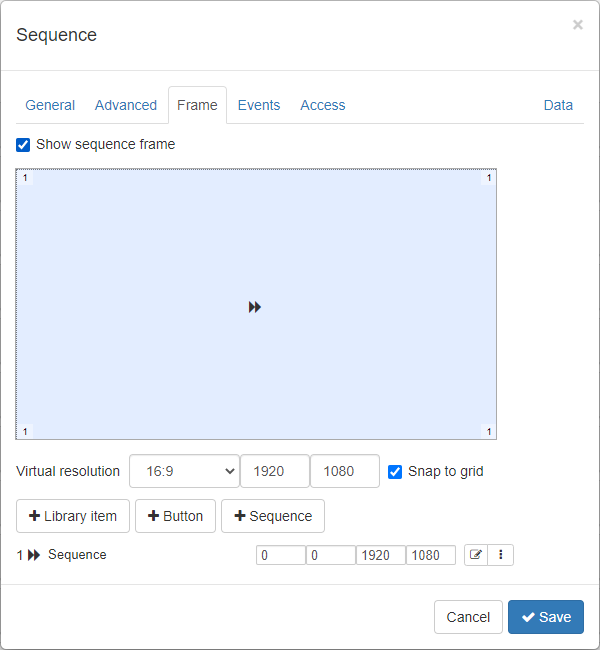
Virtual resolution — Set the resolution for the framed sequence.
 — Click this button to add a library item to the frame. Use the cursor to adjust the size and position of the item once it is added.
- Click and drag the numbered corners to adjust the size.
- Hover the cursor over the centre of the item, then click and drag to adjust the position.
 — Click this button to display the Configure event dialog and add a button to trigger an action.
 — Click this button to add a sequence to the frame.
Events
Define events that interrupt regular sequential playback.
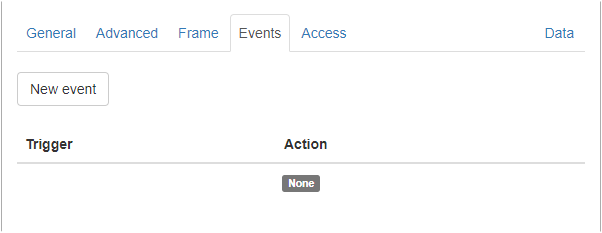
An event consists of two parts; a trigger and an action. When the trigger occurs, the action is performed. Actions include displaying a web page, playing another sequence, collecting data (such as an email address), or adding advanced data.
A trigger can occur at any time while the item is displaying and the action will interrupt the playback of the active item.
Click New event to display the Configure event dialog and define an event.
Access
Grant additional users and user groups to access to the sequence item and set the access control level.
Users with access to this item
Enter a valid email address, select the permission level, then click Add.
- Full — The user will have full access to the item.
- Read only — The user can only view the item.
Users with access to these groups have access to this item
Enter a valid group name, select the permission level, then click Add.
- Full — Users with access to the selected group have full access to the item.
- Read only — Users with access to the selected group can view the item but not control it.
- Low vis — Users with access to the selected group will not see the item displayed in the full list of items. This can help speed up performance when there are a lot of items. For more information see Low visibility access controls.
Click the Delete button ( ) to remove a user or group from the sequence item.
Data
Add custom data to the sequence. The data may be used in condition evaluation or to store any additional information required.
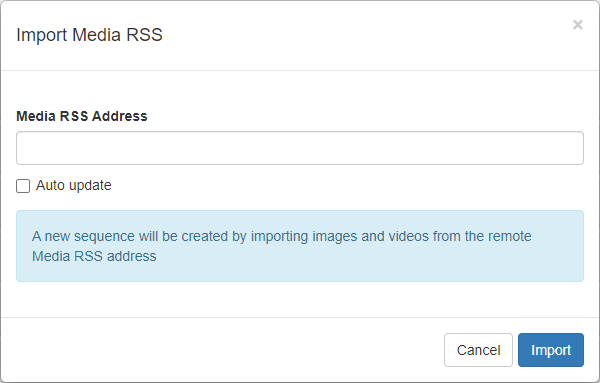
Import Media RSS dialog
Use the Import Media RSS dialog to create a sequence by importing images and videos from a remote Media RSS address.
To display this dialog:
- Click the arrow beside the Add Sequence button (
 ).
). - Click Import Media RSS to display the Import Media RSS dialog.
- In the Media RSS Address field, enter the remote media RSS address.
- Click Auto update to ensure the sequence created from the RSS feed updates automatically.
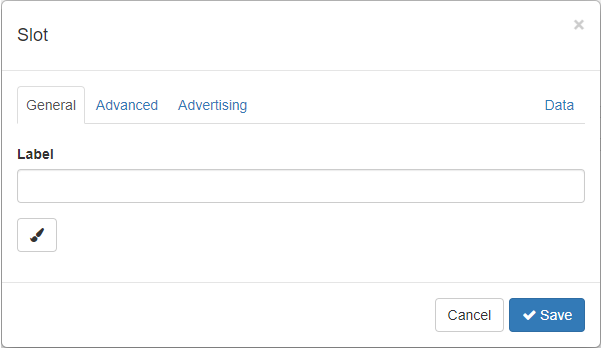
Slot dialog
Use the Slot dialog to configure some general settings for a sequence slot.
To display this dialog:
- Sign in to the admin interface.
- On the top menu bar, click Sequences.

- Click the Open button (
 ) on a sequence item to expand it.
 - Click a slot header to display the pop-up menu.
- Select Settings to display the Slot dialog.
The following tabs are available:
General
Label — Enter a new name for the slot. Leave blank to keep the default name which will include the slot number.
 — Click this button to choose a colour and apply it to the slot header.
Advanced
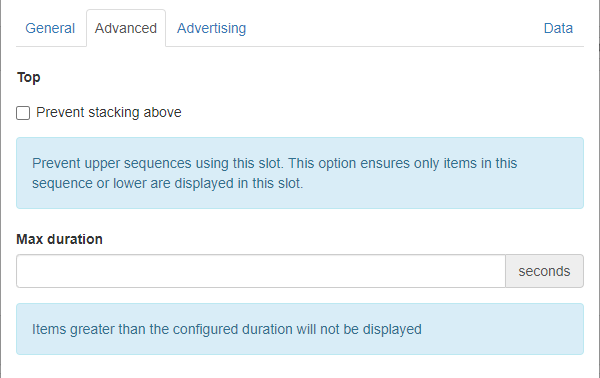
Prevent stacking above — Select this option to prevent upper sequences from using this slot. When selected, only items in this sequence or lower are displayed in this slot.
Max duration — Enter a duration for the slot. Any items with a duration longer than the one specified will not be displayed, both in the current sequence and in any stacked above it.
Advertising
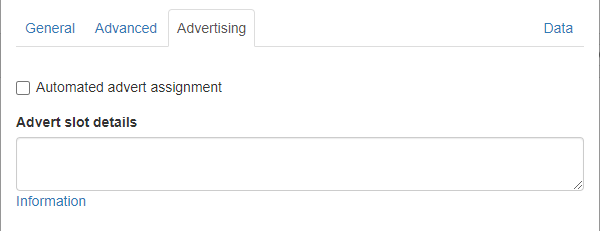
Automated advert assignment — Select this option to use Automatic Advert Assignment. Click Information to access help on how to use this option.
Data
Add custom data to the slot. The data may be used in condition evaluation or to store any additional information required.
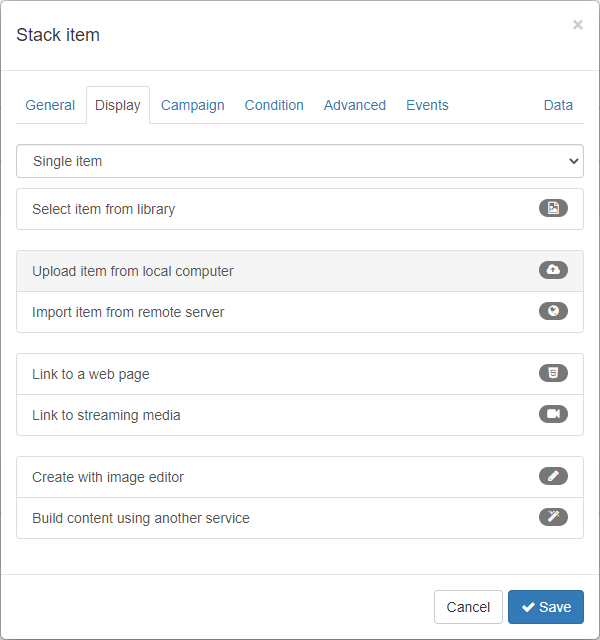
Stack item dialog
Use the Stack item dialog to add content to a sequence and specify when it is played.
To display this dialog:
- click the Add new item button (
 ) in a stack; or
 - click the Options button (
 ) on a stack item and select Edit.
The following tabs are available:
General
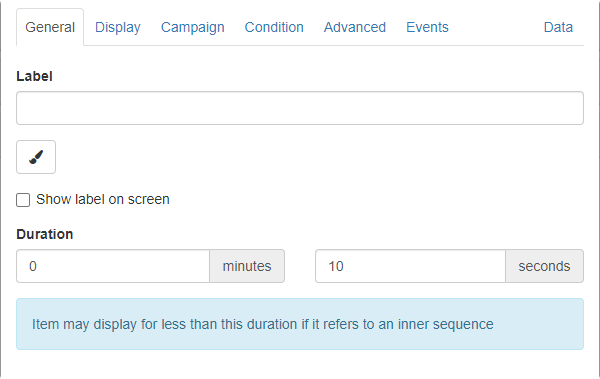
Label — The name of the item, which will be displayed on the thumbnail.
 — Click choose a colour and apply it to the stack item. Colours enable you to easily identify items in the sequence. Colours applied to a stack item are not displayed on the screen during playback and are for helping manage content in the admin interface only.
Duration — Control how long an image or web page is displayed before progressing to the next item. If a video is uploaded and this field is not modified, it will be populated by the length of the video.
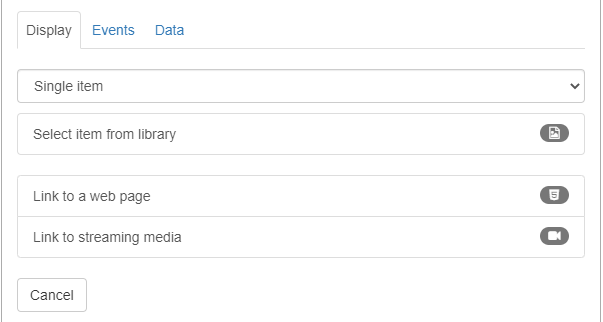
Display
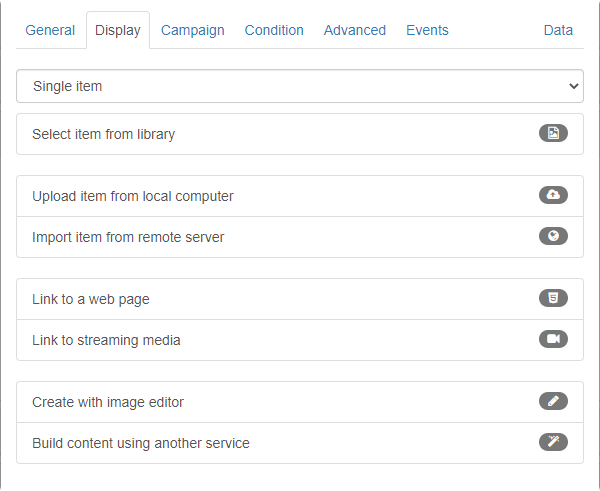
Use the options on the Display tab to define the multimedia to be displayed. The options available on this tab depend on which display type is selected. There are 3 display types:
- Single item — Upload a single item to the stack. The following options are available.
- Select item from library — Select an item from the library to add to the sequence.
- Upload item from local computer — Select an item to upload from your computer.
- Import item from remote server — Enter the address of the remote server. The item will be downloaded and stored so it will play offline.
- Link to a web page — Enter the address of the web page. The web page will be loaded and displayed by the player using Android WebView.
- Link to streaming media — Enter the custom streaming address. Ensure the playback device and player supports the stream. For example: http://, rtsp://, hdmi://, camera://, hls-http://, or dash-http://.
- Create with image editor — Open the Image editor so you can modify an item before importing it.
- Build content using another service — Add weather, exchange rates, an RSS feed, or a Twitter feed.
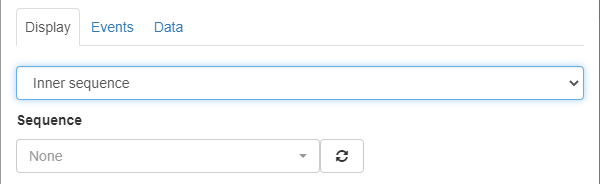
- Inner sequence — Create an inner sequence from a previously created sequence. Select the sequence you want to save as an inner sequence from the dropdown list.
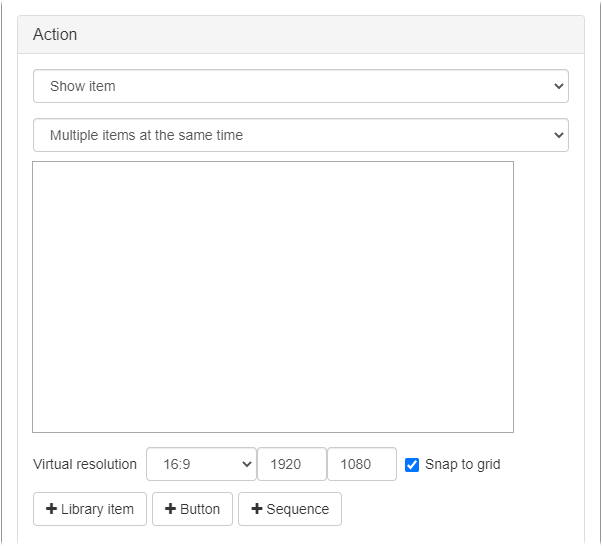
- Multiple items at the same time — Position multiple items or sequences on the screen at once to create a composite item.
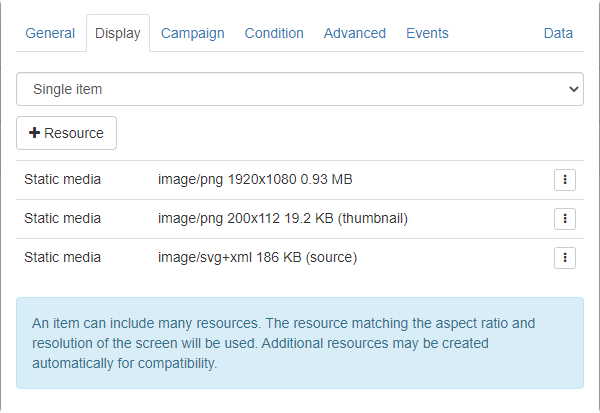
If you’re editing an existing stack item, the Display tab displays the selected content.
Campaign
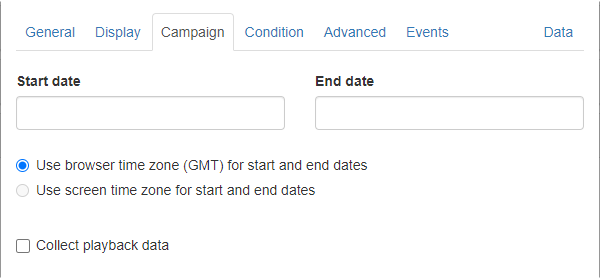
Control how long a stack item will be displayed in a sequence by entering a start and/or end date.
When Collect playback data is selected, additional options become available.
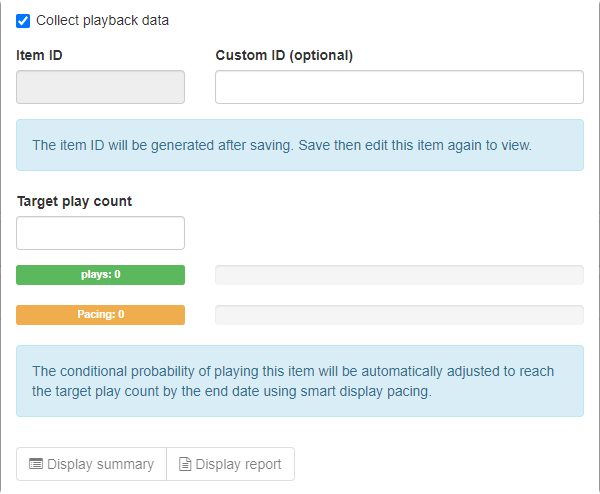
Enter a Target play count and a date range and smart display pacing either displays or skips the item in a given loop of the sequence in order to meet the target play count by the end date.
Condition
Use conditions to determine if an item is displayed or skipped. If a condition is true, the item is displayed and the sequence progresses to the next slot. If a condition is false, the item is skipped and the item below it in the stack is evaluated.
Enter conditions manually, or click Build new condition to display the Build new condition dialog, which enables you to construct conditions based on location, scheduling, and frequency.
Advanced
Configure transition animations to provide visually pleasing movement between items in a sequence.
Events
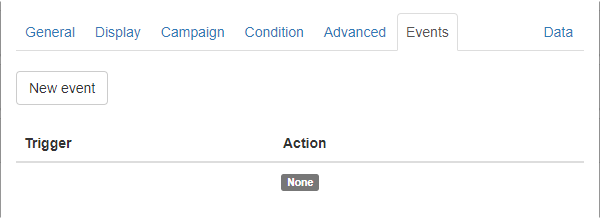
Define what happens when the item on the screen is touched, a key is pressed, or a condition is true.
An event consists of two parts; a trigger and an action. When the trigger occurs, the action is performed. Actions include displaying a web page, playing another sequence, collecting data (such as an email address), or adding advanced data.
A trigger can occur at any time while the item is displaying and the action will interrupt the playback of the active item.
Click New event to display the Configure event dialog and define an event.
Any events created for an item are listed on the stack item’s dialog.
Data
Add custom data to the stack item.
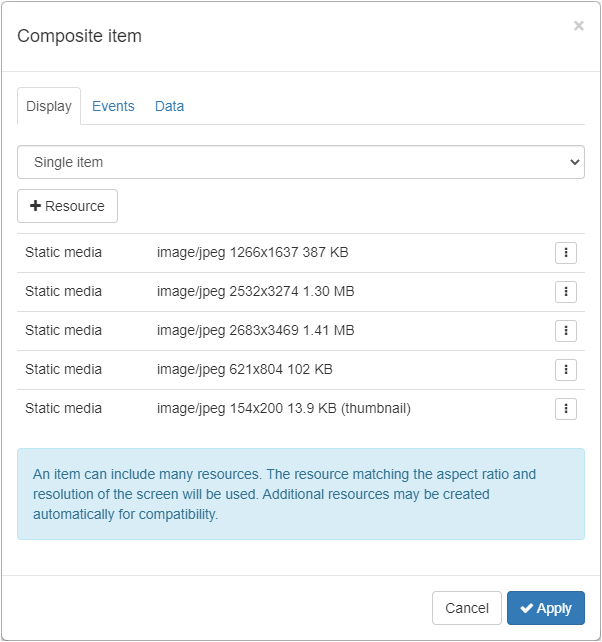
Composite item dialog
Use the Composite item dialog to edit a resource, add an event, or add data to an individual item that has been added to a composite stack item.
To display this dialog,
- Create a composite item.
- On the Stack item dialog for the composite item, either:
- click the Edit button (
 ) beside the item you wish to edit; or
 - click the Options button (
 ) beside the item you wish to edit and select Edit from the pop-up menu.
The following options are available:
Display
Use the options on the Display tab to redefine the multimedia to be displayed within the composite item. The options available on this tab depend on which display type is selected from the dropdown menu. There are 3 display types:
Single item — Select this option to select an item from the library, link to a web page, or link to streaming media.
 — Click to update the dialog, which enables you to select the resource you want to display in the composite item.
Inner sequence — Select this option to add an inner sequence to the composite item. Select a sequence from the Sequence dropdown list to replace the item being edited.
Multiple items at the same time — Select this option to create another composite item within the composite item being edited.
Events
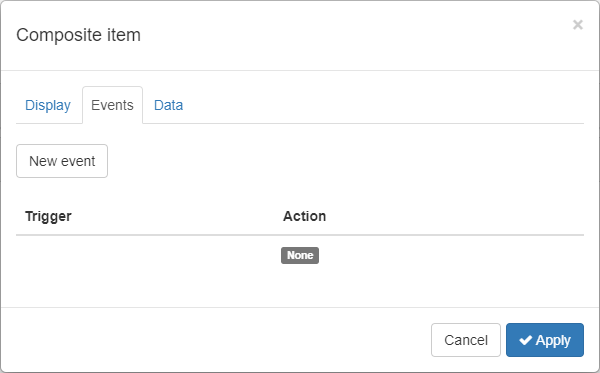
Click the New event button ( ) to display the Configure event dialog and define an event for one of the items you’ve added to the composite item.
Data
Add custom data to the composite item.
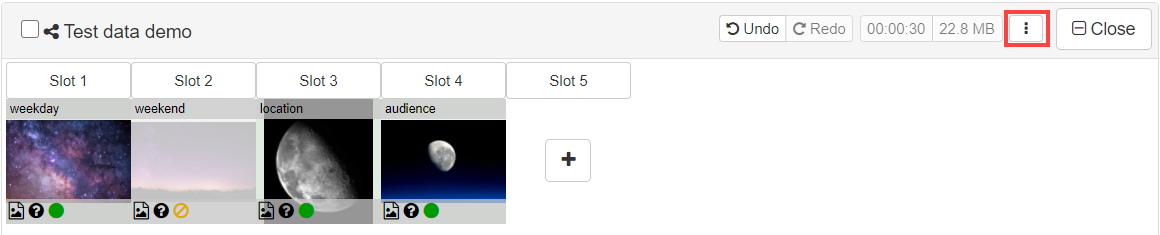
Set test data dialog
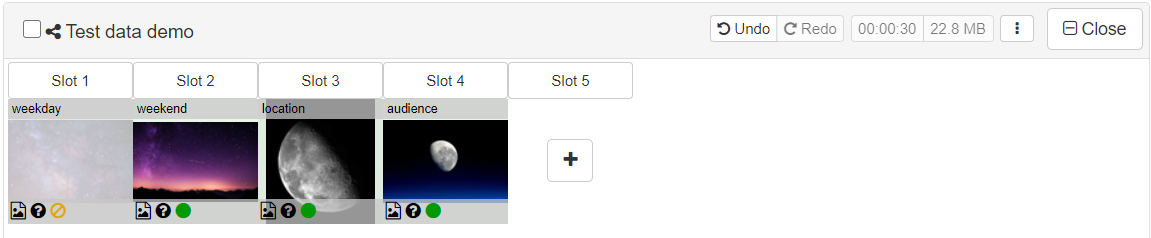
Use the Set test data dialog to fabricate conditions so you can test which items are active when specific conditions are met. Active stack items will display a green dot.
To display this dialog:
- Click the Open button (
 ) on a sequence item.
 - Click the Options button (
 ) on the sequence item header.
 - From the pop-up menu, select Set test data.
The following options are available:
Date and time — Enter the date and time manually or click the field to select the date and time from the popup calender. Click Apply after updating this value to test whether the scheduling conditions you’ve set resolve as expected.
 — Click to display the Set location dialog and dynamically move the marker to select a location on the map or manually enter an address. Click Apply to save your location settings and close the Set location dialog, then click Apply on the Set test data dialog to test whether the location conditions you’ve set resolve as expected.
 — Click to add a new row to the bottom of the list. You can use this to test any custom data that has been added to items.
— Click to delete a row of data.
When you’ve made your changes, click Apply to accept them or Cancel to dismiss them and close the dialog.
Testing scheduling conditions
If you have a condition set so that an item will display only on a weekend and you want to test it will resolve correctly:
- On the Sequence item that contains the stack item with the scheduling condition you want to test, click the Options button.
- Select Set test data to display the Set test data dialog.
- Click the Date and time field.
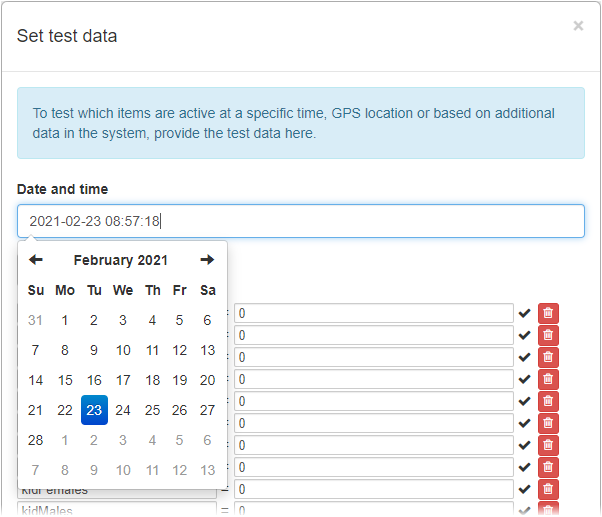
- Select a date and time on a Saturday or Sunday from the pop-up calender, or enter one in manually.
- Click Apply.
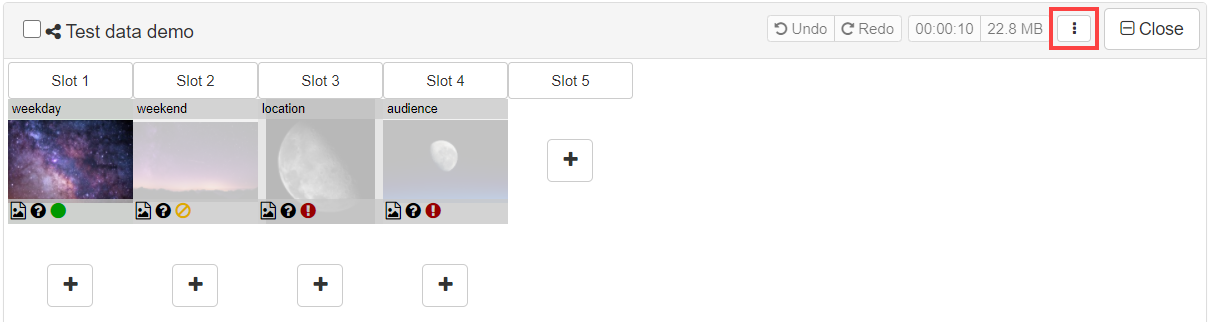
Now the item with a weekday only condition will be not displayed, and the item with a weekend only condition will be displayed.
Testing location conditions
- On the Sequence item that contains the stack item with the scheduling condition you want to test, click the Options button.
- Select Set test data to display the Set test data dialog.
- Click Set location. The Select location dialog is displayed.
- Move the red marker, enter a term into the search field, or manually enter an address to specify the location of the screen.
- Click Apply to close the Select location dialog. The gps fields on the Set test data dialog are updated with the new location.

- Click Apply on the Set test data dialog.
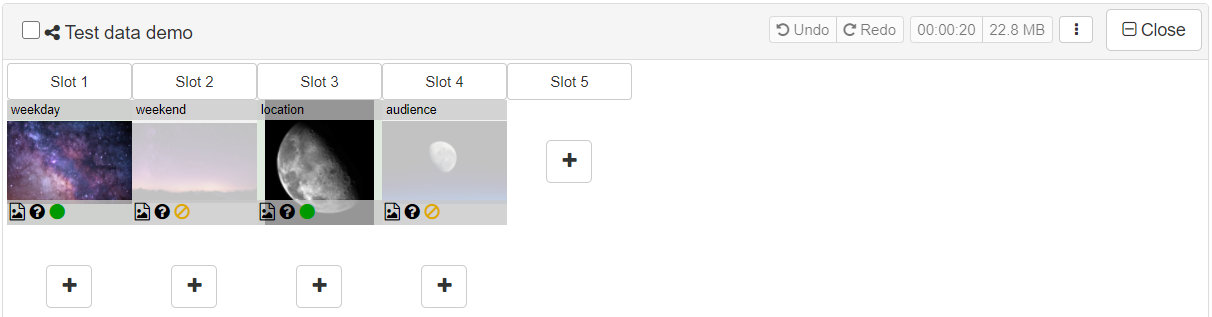
Now, the item with a condition restricting it to a specific location will be displayed when you preview the sequence.
Sequence schedules
A sequence schedule automatically switches between different sequences based on the date and time.
Unlike regular date/time based conditions, a sequence schedule will automatically stop playing a long inner sequence loop when a scheduled time block finishes. This makes it easier keep to a schedule.
A sequence schedule contains a single stack of items. Each item represents a time block and references another sequence to play during the time block.
By default, media items will play until completion which may cause a delay starting the next time block. To ensure the next time block starts on time, items can be configured to allow them to finish early.
Create a sequence schedule
- Click the add sequence button
- Select Schedule from the Type drop down list.
- Provide a label/name.
- Click Save.
A new sequence schedule will be created:
Setup a schedule
- Click the Setup button
- Select the schedule type
- Click Apply.
The sequence will display as a stack of items. Each item is used to reference another sequence. Each sequence will play during the time block.
A sequence schedule can refer to another sequence schedule to divide into progressively smaller time blocks. For example the main sequence could link to a weekly schedule. Each day of the week could then link to an hourly schedule, finally each hour could link to a regular sequence of content to play (and loop) during the hour. This hierarchical approach means repetition, by referring to the same inner sequences, is quick and easily to create complex 24/7 schedules.
Adjustments to maintain schedule accuracy
Sequence schedule conditions are evaluated when transitioning between items in inner sequences. This allows looping inner sequences to finish before loop completion.
All items play for their configured duration by default and this may delay progressing to the next scheduled inner sequence.
Enable Finish playing early if interrupted by an outer sequence schedule to allow the player to dynamically change an items duration to maintain schedule timing accuracy. All items should also have a duration less than 1 hour.
Recommendation for unreliable networks
To minimize the possibility of a black screen during network failure, it is recommended that each inner sequence contains some common items that are reused across multiple time blocks.
In the event of a failure to stream or download new items, the common items should still display. This is because reusing common items increases the chances of the media being available in the local cache and therefore play without needing a working network connection.
Resilient setup example
Every 1 hour time block could contain 1 hour of new scheduled items followed by a reference to a common inner sequence of items.
When there are no connectivity issues, the 1 hour of new scheduled items play as expected.
However, if connectivity issues occur, the unavailable scheduled items will be skipped and eventually progress to the common inner sequence of items that are more likely to be cached on the local device.
Please review the caching options when using SignageNode on unreliable networks.
Software requirements
Software recommended for sequence schedules:
- signagenode-2022-11-20.apk +
- android-player-28.0.apk +
Please note, earlier player software does not support finishing looping inner sequences before loop completion.
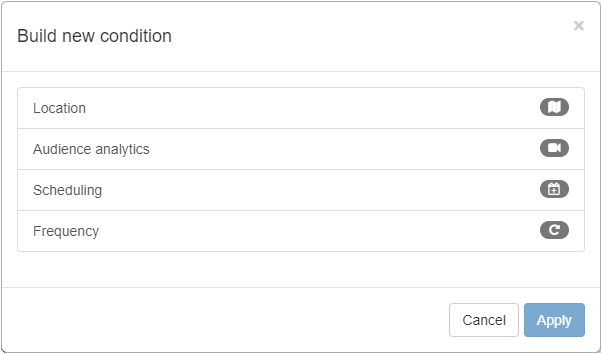
Build new condition dialog
Use the Build new condition dialog to create and add a conditional trigger to control when specified items are displayed or skipped. To display this dialog, click the Build new condition button ( ), which can be found on one of the following dialogs:
- the Configure event dialog, when Condition is selected as a trigger.
- the Condition tab of the Stack item dialog.
- the Defaults tab of the Library item dialog.
Note: To manually add conditions, please see the Advanced conditions article.
Location
Use the map tools to define a geofence, for example:
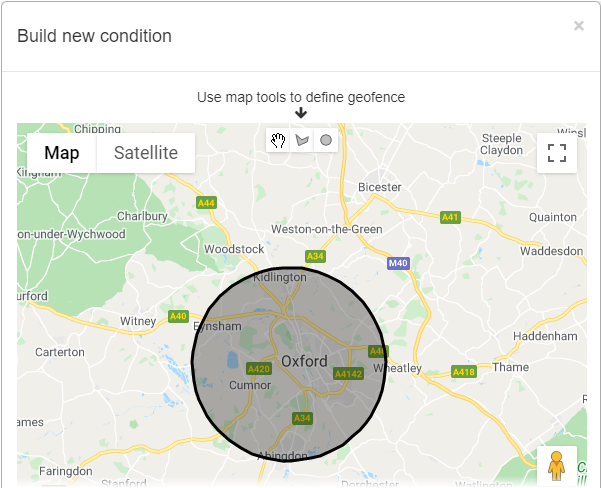
Click Apply to create the condition.
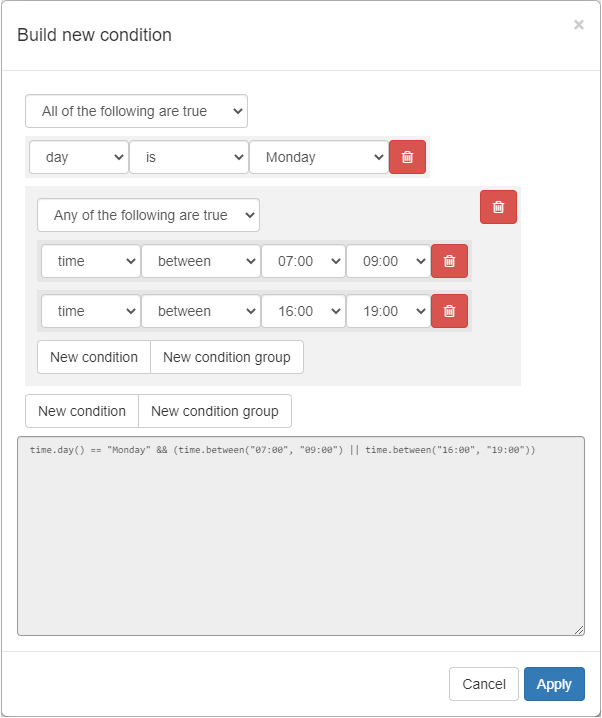
Scheduling
Use scheduling to limit the display of an item to a specific period. Add multiple scheduling conditions and create groups to create more complexity. For example, you could limit the display of an item to only weekdays, or add more complexity and limit it to weekdays, between 7am and 9am.
Frequency
Control how often an item is displayed over a set period.
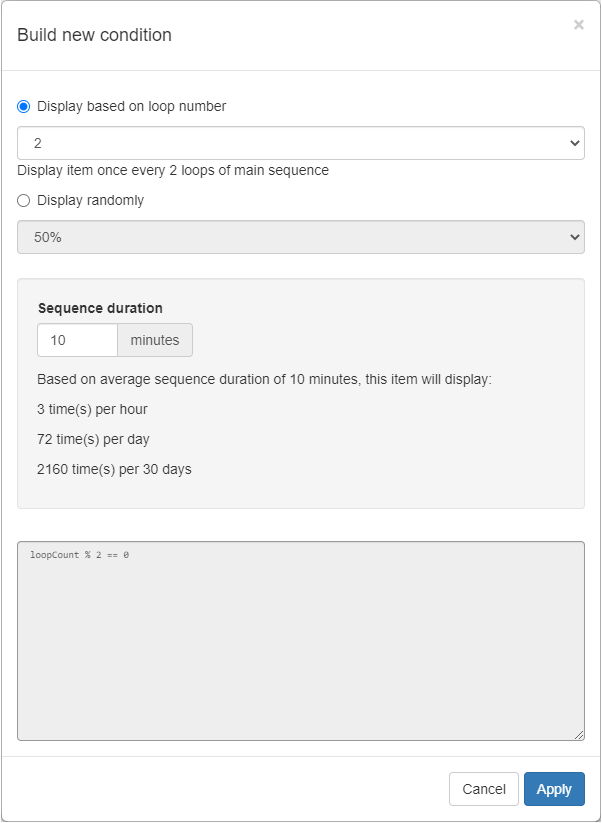
Display based on loop number — Select this option, then select a number between 2 and 10 from the dropdown menu to define number of times you want the main sequence to loop. The item will be displayed once for every number of loops defined.
Display randomly — Select this option, then select a percentage from the dropdown menu. The item will be displayed with a probability of this percentage for each loop of the main sequence.
Sequence duration — Enter the length of your sequence in minutes to find out how many times per hour, per day, and per 30 days the item will be displayed with the current settings.
Configure event dialog
An event consists of two parts; a trigger and an action. When the trigger occurs, the action is performed. Actions include displaying a web page, playing another sequence, collecting data (such as an email address), or adding advanced data.
A trigger can occur at any time while the item is displaying and the action will interrupt the playback of the active item.
Click the New event button on the Events tab of the Library item dialog, Stack item dialog, Sequence dialog, or Screen dialog to display the Configure event dialog. Use this dialog to define a trigger and an action to be performed. A trigger can occur at any time while the item is displaying and the action will interrupt the playback of the active item.
The following options are available:
Trigger
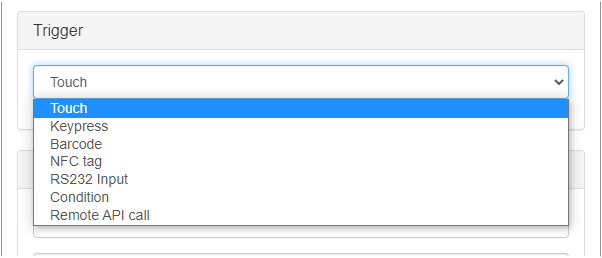
- Touch — Select to trigger the playback action only when an item/screen is touched.
- Keypress — Select to trigger the playback action only when a specified key is pressed. Specify the key (0-9, A-Z) in the Key dropdown list.
- Barcode — Select to trigger the playback action only when a barcode matches the specified pattern. Enter the barcode pattern in the Pattern field, or leave blank to trigger on every scan. When the action is to display a web page, add ~barcode to the web page address to pass the barcode through to a web service.
- NFC tag — Select to trigger the playback action only when an NFC tag matches the specified pattern. Enter the NFC tag pattern in the Pattern field, or leave blank to trigger on every scan. When the action is to display a web page, add ~nfcTagText to the web page address to pass the barcode through to a web service.
- RS232 input — Select to trigger the playback action only when RS232 input matches the specified pattern. Enter the RS232 input pattern in the Pattern field.
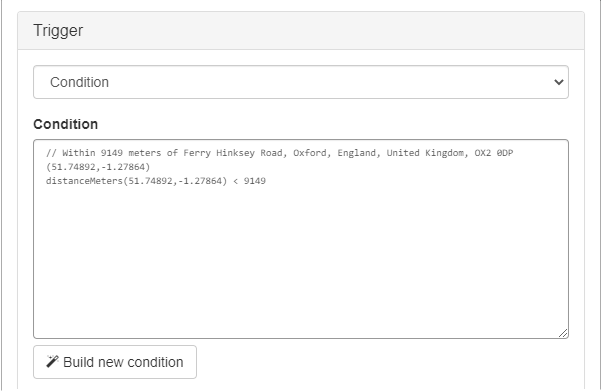
- Condition — Select to trigger the playback action only when specified conditions are met. Enter conditions directly into the Condition field or click Build new condition to display the Build new condition dialog which provides options to help you build conditions based on Location, Scheduling, and Frequency.
Note: Be careful not to create conditional triggers that continuously fire and interrupt regular playback. Conditional triggers should only evaluate to True briefly and should go out of scope as a result of the action.
- Remote API call — Select to trigger the playback action with a web request from another device. This option allows independent systems to be linked. For example an alarm system could be configured to make an API call to trigger the action.
Action
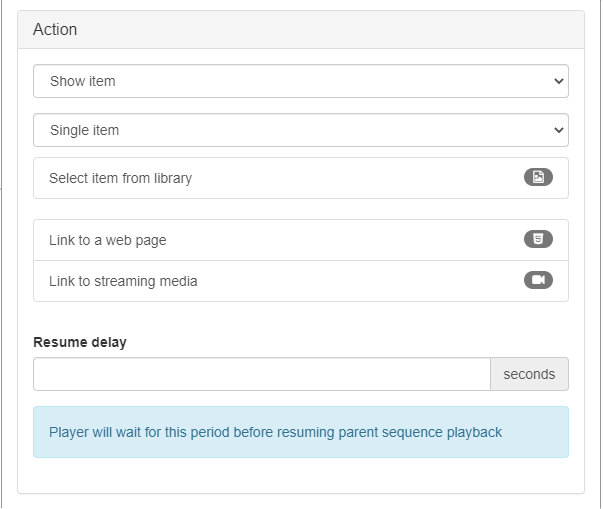
In the top dropdown list, select the playback action. The options available on the dialog change depending on what you select.
Show item — When selected and the trigger occurs, you can choose a single item, a sequence, or multiple items to be displayed when the trigger is met.
- Single item — Choose a library item, link to a web page, or link to streaming media.
- Inner sequence — Select a sequence from the Sequence dropdown menu.
- Multiple items at the same time — Add multiple library items and position them in the box to determine their onscreen layout.
Show web page — When selected and the trigger occurs, enter a web address in the Address field. This web page will display when the trigger is met. You can chose whether to allow users to be able to interact with it or not.
Launch application — When selected and the trigger occurs, this action will launch another application installed on the device. For example, open a ticket booking app or print a voucher.
Ask for information — When selected and the trigger occurs, enter information in the available fields to construct a simple dialog to request information from the user. For example: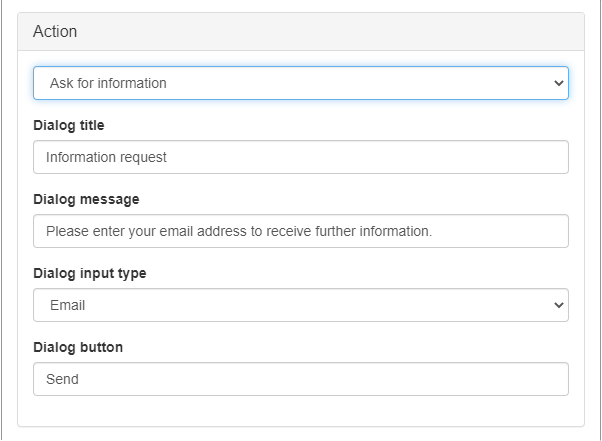
Report information — When selected and the trigger occurs, this action will ask the viewer for information to submit, for example an email address or phone number. This information will be sent to our servers and be made available in the collected data report.
Add screen data — When selected and the trigger occurs this action will put some data into the screen data. This data can then be used elsewhere in the system; typically inside a condition. This makes it possible to build stateful sequences. For example, a screen could contain the data showWarning=true and an item could be configured to only show when showWarning==true. A trigger and this action could then subsequently set showWarning=false and prevent the warning from displaying again.
Show next item — When selected and the trigger occurs, the next item in the sequence is displayed when the trigger is met.
Show previous item — When selected and the trigger occurs, the previous item in the sequence is displayed when the trigger is met.
Branch back — When selected and the trigger occurs, if the viewer has jumped between sequences (as a result of an action branching to an inner sequence), this will return the viewer to the previous sequence.
Resume delay — If you have selected Show item, Show web page, or Launch application, you can enter a time by which to delay resuming the parent sequence.
Synchronising playback on multiple screens
This article outlines how to synchronise multiple screens so that images and videos in a sequence start displaying at the same time.
Enable playback synchronisation
To synchronise multiple screens so that they maintain the same position in a sequence, playback synchronisation must be enabled in sequence settings. To do this:
- Open the Sequence dialog.
- Select the Advanced tab.
- Select the Sync tab.
- Click Synchronise playback with local devices.

When playback synchronisation is enabled, devices will broadcast a slot number and time schedule for a synchronised sequence to progress to the next slot. This ensures that all screens connected to the same sequence display the same slot number.
Alternate content for video walls
Playback synchronisation can be extended to start displaying different items (with the same duration) on different screens at the same time. This opens up new possibilities to construct video walls.
For example, a 2×2 arrangement of screens and devices can be erected to form a large videowall. Different content can be uploaded for each screen to build a complete image.
There are two ways of configuring alternate content to display while maintaining synchronisation: One method uses a base sequence and custom sequences stacked on top (1 for each screen). The other method uses a single sequence with conditions to select the desired content.
Using base sequences
A base sequence makes it easy to define a common sequence containing default items that will synchronise playback across many screens.
For each screen, a custom sequence is created that uses the shared base sequence. The custom sequence is applied to the screen.
To add alternative content for a screen, the corresponding custom sequence is updated to include the alternative content. This will override content in the shared base.
Using conditions
Conditions can be used if it is more convenient to only manage a single sequence containing all the content destined for all the screens.
For example consider a video wall of 2 screens positioned side by side.
- Add identifying data to each screen to use in conditions. For this example, one screen could contain screenPosition=left and the other could contain screenPosition=right in the screen data.
- In each slot of the sequence, stack two items. One item for the left screen, another for the right.
- For each item add a condition to ensure it displays on the correct screen. For this example, items to display on the left screen would use the following condition: screenPosition == “left”
Further considerations
- Playback synchronisation does not take effect until all resources in the sequence have downloaded.
- A slot must contain at least one item to display.
- All items in a slot must have the same duration.
- Do not configure conditions that result in a screen having a different loop duration.
- Do not configure events that will interrupt playback synchronisation.
Technical note: There is no master device controlling the timing. All devices broadcast planned sequence progression information and the most recent received broadcast is used by all devices displaying the same sequence.
Video Ad Serving Templates (VAST)
Introduction
VAST (Video Ad Serving Template) is a specification defined and released by the Interactive Advertising Bureau (IAB) who sets a standard for communication requirements between ad servers and video players to display video ads.
Using VAST, a digital signage player can automatically request an ad from an ad server, display it and report back to the ad server. This is important for advertisers because it gives them control of their ads and provides them live impression and tracking data.
To link SignCloud to an ad server, special web addresses are used. These web addresses (also known as URLs) are issued by the ad server and will typically be provided by an advertising agency.
Ad servers that require JSON to posted as part of the request to further customise the advert selection process are supported. Both the address and the POST can be dynamically customised using macros which are variables in square brackets.
Example DooH ad servers include Hivestack and Place Exchange. We also have an adapter built in that converts Vistar Media JSON responses into VAST responses for use on our players.
Any ad server that returns a VAST response should be compatible with our implementation.
Linking a sequence to VAST
To link the sequence into SignCloud, perform the following steps:
- On the Sequences tab, click Add Sequence (
 ) to display the Sequence dialog.
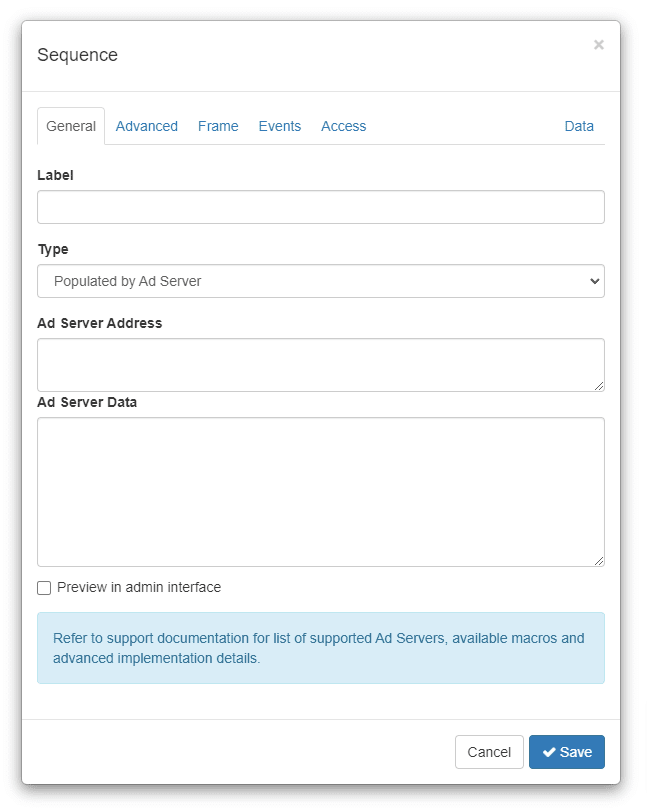
 - On the General tab, enter a Label for the new sequence e.g. My VAST Ads.
- In the Type dropdown menu, select Populated by Ad Server.
- Enter the ad server address in the Ad Server Address field.
- If required, enter ad server data in the Ad Server Data field.
- Click Save.
If Preview in admin interface is selected, the new sequence will be displayed in the admin interface. Please note, the ads shown may not be the same as those played by the player. This is because most ad servers dynamically change the ads based a variety of metrics and the players will be issued different responses. Many ad servers will return no ads, in which case an error will be displayed. Please make sure you test the ad server setup on the output screen.
To display the ads within your main sequence of content, add a new item in your main sequence that displays the VAST sequence as an inner sequence.
- On the Sequences tab, click the Open button (
 ) on your main content sequence.
 - Click the Add button (
 ) in an available slot to display the Stack item dialog.
 - On the Display tab, select Inner sequence from the top dropdown menu.

- Select your VAST sequence from the Sequence dropdown menu.
- Click Save.
Ad Server Setup Examples
Hivestack Setup Example
When displaying the same sequence on multiple screens, it is useful to move the Hivestack UUID out of the sequence’s Ad Server Address into the screen data.
Add the field hivestackUuid into screen data populated with the screen UUID provided from Hivestack.
The sequence Ad Server Address should then reference the data field as a VAST macro (square brackets):
For Testing:
https://uat.hivestack.com/nirvana/api/v1/units/[hivestackUuid]/schedulevast
For Live:
https://apps.hivestack.com/nirvana/api/v1/units/[hivestackUuid]/schedulevast
Ad Servers for digital signage often require additional data to supplement what is specified in the address. This data is typically JSON sent in the body of the ad request. Platforms such as Place Exchange (OpenRTB) and Vistar (Custom) can be sent supplemental data by populating the Ad Server Data field.
Place Exchange Setup Example
Ad server address provided by Place Exchange. Ad server data example:
{
“deals”:[
{
“at”:3,
“bidfloor”:1,
“bidfloorcur”:”USD”,
“name”:”prod-video-test”
}
]
}
Vistar Setup Example
Ad server address provided by Vistar. Ad server data example:
{
“api_key”: “VISTAR-API-KEY”,
“network_id”: “VISTAR-NETWORK-ID”,
“venue_id”: “VISTAR-VENUE-ID”,
“device_id”: “[screenId],
“display_time”: [PROJECTED_DISPLAY_TIMEUNIX],
“latitude”: [gpsLatitude],
“longitude”: [gpsLongitude],
“display_area”: [
{
“id”: “[screenId]”,
“supported_media”: [“image/jpeg”,”video/mp4″],
“allow_audio”: true,
“width”: [screenWidth],
“height”: [screenHeight],
“min_duration”: 1,
“max_duration”: 100,
“static_duration”: 5
}
]
}
Replace BOLD with values provided from Vistar. These values can be moved into screen data and referenced using macros similar to the Hivestack example above. Do not provide gpsLatitude or gpsLongitude if device is not mobile
Important implementation details
SignageNode
glplayer-2022-05-20.apk+
signagenode-2022-07-23.apk+
SignageNode (previously GLPlayer) prepares VAST items a few seconds before they are due to display (as arranged in the sequence / playlist). This period is known as the Prepare Period and can be configured on the SignageNode settings page. If there are any problems during this period, the item is silently skipped and playback progresses to the next item. Errors and skip notifications are added to the messages section on the status page.
The first time an advert is played it is cached while playing. If the advert media address is the same for subsequent plays, the media is read from the internal cache. Some ad servers do not maintain consistent addresses for the media. This will waste bandwidth unfortunately.
Standard player
android-player-25.0.apk+
Our standard digital signage player software must download videos fully before they play. This presents difficulties when using VAST as VAST is designed for streaming. To work around this limitation, the standard player downloads asynchronously to playback.
- Communication with the ad server occurs approximately 5 minutes before the advert is projected to be displayed. (or duration of loop if shorter).
- The most suitable media files are downloaded to local storage.
- The VAST sequence becomes ready for display.
- When the main sequence progresses to the ad server populated sequence, it will be displayed.
Since preparing the ad server populated sequence occurs asynchronously to playback, ad servers must not assume that playback occurs immediately after downloading the VAST. There will typically be a 5 minute delay before the ad is displayed. The ad will not be displayed if it fails to download within 5 minutes. After displaying the ad, it will be invalidated to trigger repeat communications with the ad server 5 minutes before it is next required.
Sequences are dynamic, which means scheduling is only approximate. VAST requests will occur approximately 5 minutes before the item is displayed, but may be 0 to 10 minutes (see vastMaxAge below).
For tracking both impressions and playback progress, the VAST must correctly define Impression and Tracking events. The player will perform these callbacks synchronously to playing the ad.
In general, digital signage players are not interactive. For this reason interactive options such as skipping ads and clickable web links are not supported.
VAST Features supported
The following features are currently supported:
- VAST 2.0 to 4.2 XML responses
- Vistar JSON responses (when address contains vistarmedia.com)
- Linear MP4 video creatives
- Impression reporting
- Tracking
loaded, start, firstQuartile, midPoint, thirdQuartile, complete, progress - Wrappers
- AdPods (multiple ads)
- Macros
TIMESTAMP, CACHE_BREAKER, CACHEBUSTING, ERRORCODE, VASTVERSIONS, CLICKTYPE, PLAYERSTATE, PLAYERSIZE, LATLONG, ADTYPE, ADSERVINGID, START, DURATION, DVC_SID, DEVICEID, IP_ADDRESS, USER_AGENT, CLIENTUA - Closed caption files (VAST 4.1+)
- Expires
- Error reporting
The following features are not supported:
- Icons
- Categories
- Ad verification code
- Non-linear ads
- Companion ads
- VPAID
- Video clicks
- Skippable ads
Advanced options
The following advanced options are supported within the VAST sequence data (standard player only):
| vastPreparePeriod | The period (in milliseconds) used to download and prepare the ad prior to displaying it. Preparation occurs when an earlier slot in the sequence starts displaying. Default 5 minutes (300000) |
| vastMaxAge | The period (in milliseconds) to cache the VAST response. Must exceed vastPreparePeriod. The ad server will only communicate with the Ad server after a this period has elapsed or an ad from the response has displayed.Default 10 minutes (600000) |
VAST Response Example
The VAST XML structure can be checked by opening the VAST URL in a web browser. It should look something like this:
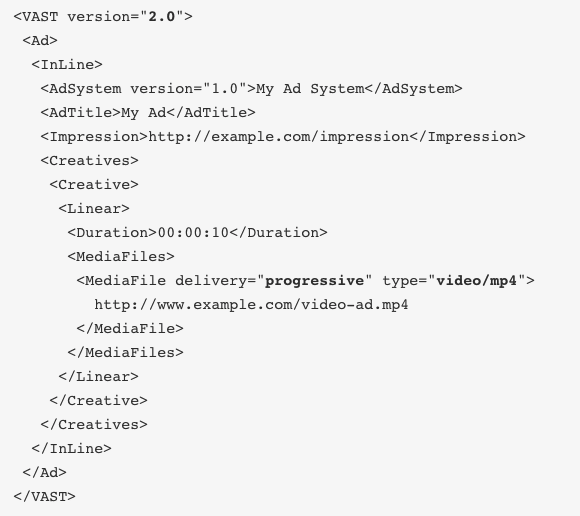
SignCloud supports VAST versions 2.0 to 4.2 as defined at the top of the XML. Ensure media file delivery is progressive. Also ensure the type is video/mp4.
Item Map
The item map is a visualisation designed to illustrate how sequences and stacks map to displayable items. This visualisation is extremely useful when a hierarchy of inner sequences are used. The item map will traverse into inner sequences and display how nested inner sequence structure maps to items.
To display the item map:
- On the Sequences tab, click an Open button (
 ) to open a sequence.
 - Click the Options button (
 ) on the sequence header.
 - Select Item map from the Options pop-up menu.
Example Item map:

Key:
| Colour | Details |
 | A sequence. Links to SignCloud. |
 | A stack. Links to display items or inner sequences. |
 | A display item that will display based on its current state. |
 | A display item that will not display based on its current state. |
 | The library item the display item was copied from. |
Click sequences and items to find additional information. A link is included to find sequences and library items in the admin interface.
Testing item conditions
The SignCloud engine is used to determine if an item will display based on the current test data set in the admin interface.
Data added as parameters to the URL will modify state and be used in item evaluation. For example:
?gpsLatitude=51.497&gpsLongitude=-0.12