Users tab
Use the Users tab to create new user profiles or edit the settings of existing users.
To access the platform, you must have an email address and a password. These credentials and other user related data are defined in a user item.
Choose to show or hide different administration interface features to reduce complexity and simplify tasks. For example, a user may only be responsible for adding content to a sequence and only need to have the Sequences tab visible. Another user may manage the screens and only need to have the Screens tab visible.
Each user can only see the items they create unless they are granted access to other items. All items (including user items) can be shared with other users using the Access tab when editing items.
Note: It is recommended that specific users are created to control API operations.
The following options are available:
 | Click to display the User dialog, which enables you to create a new User item. |
 | Click to display the search field and two dropdown menus. These menus enable you to control which items and columns are displayed in the list. In the top dropdown menu, you can select a specific group to restrict the list to displaying only user items associated with that group. In the bottom dropdown menu, you can select which columns to display in the list. |
 | Click to refresh the list to reflect the latest changes. |
 | When you have one or more group items selected, click this button to display the Multiple selection dialog. Use this dialog to set permissions, add items to a group, and control access to all selected groups. |
 | Click to download the data on the tab as a CSV file. All data will be downloaded, even if it is currently filtered from view. |
 | Click to edit or copy a user item, view user actions, or view the item history. From the pop-up menu: Select Edit, to display the User dialog. Alternatively, you can click the user’s label in the list. Select Remove to delete a user item. Select Copy to create a copy of the user item. The copy must have a unique email address. Select User actions to open the Reports > User action report tab. Select Item history to open the Reports > User action report tab. |
User dialog
Use the User dialog to create and edit users.
To display this dialog, on the Users tab:
- click the Add User button (
 ),
), - click the label of a user item; or
- click the Options button (
 ) and select Edit.
Alternatively, you can click the User Settings button ( ) on the Home tab.
The following options are available:
General
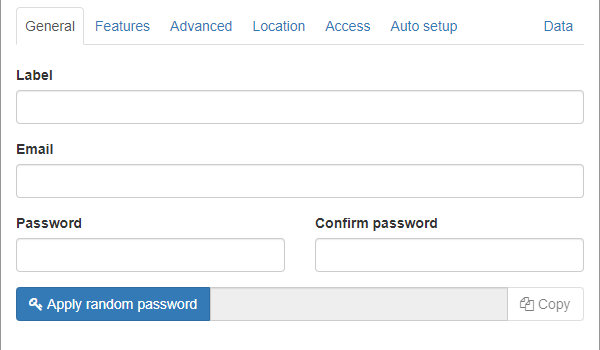
Specify a label, email, and password. The email must be unique and is used when granting group access to objects in the system.
Please be cautious when providing full names and email addresses. Ensure the privacy policy specified by the cloud configuration meets local GDPR requirements.
It is possible to specify a username instead of an email address. The username will need to be unique in the system.
Features
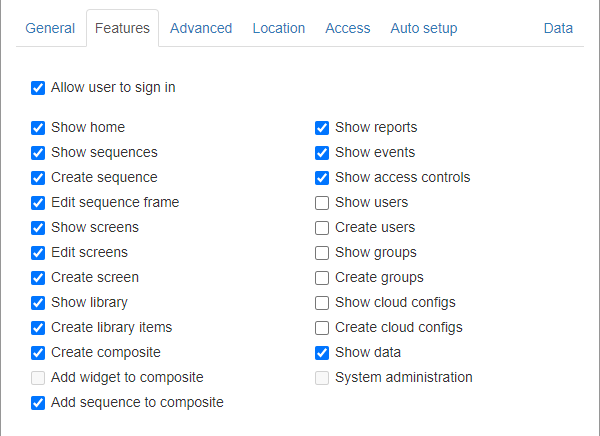
Select which features are visible to the user. You can only enable features for another user if you have those features enabled yourself.
Advanced
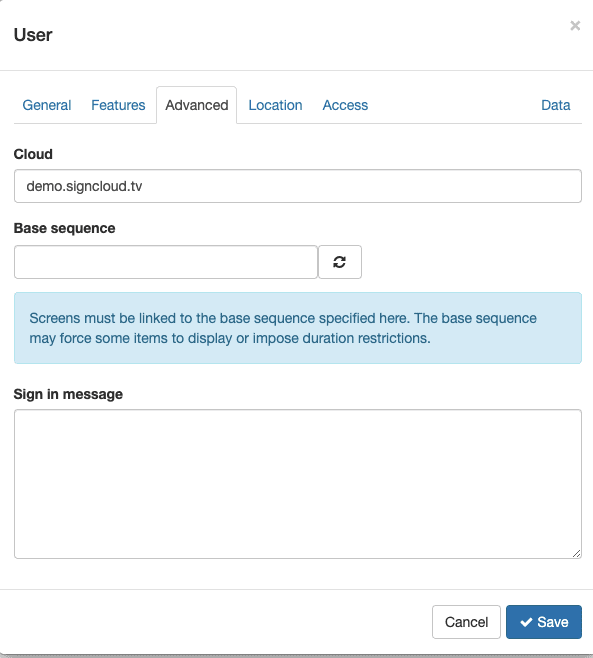
The Cloud field is populated automatically with a cloud configuration. You can enter a different cloud configuration if necessary.
In the Base sequence field, you can select a sequence that the new user will be able to use as a base sequence. The sequence selected in here will be available for the new user to select when choosing Stack on a shared base when creating a new sequence.
In the Sign in message box, you can enter a message to be displayed when the user signs in. The message will also be displayed if the user attempts to sign in but you have disabled them. This is useful for notifying the user they must contact you to pay an invoice for example.
Location
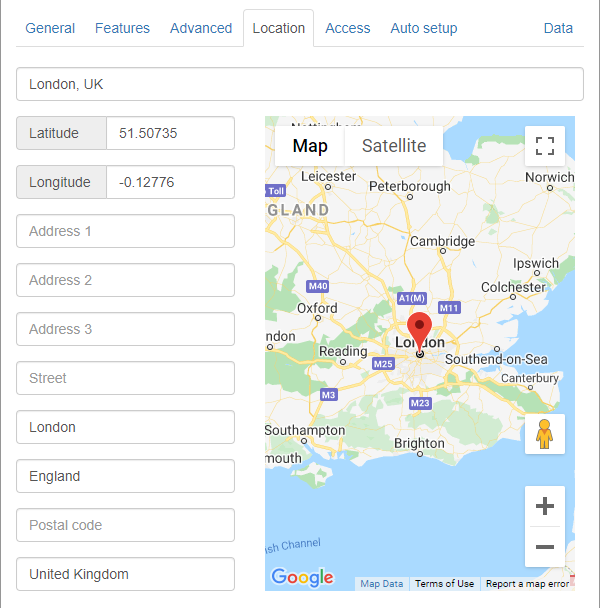
Specify an address for the user. If you enter an address into the search field, Google Maps autocompletes the other fields. You can also enter an address manually or drag the red marker to the correct position in the map view.
Again, make sure GDPR is observed. It is recommended that this location is of a public space such as where the primary screens are situated.
Access
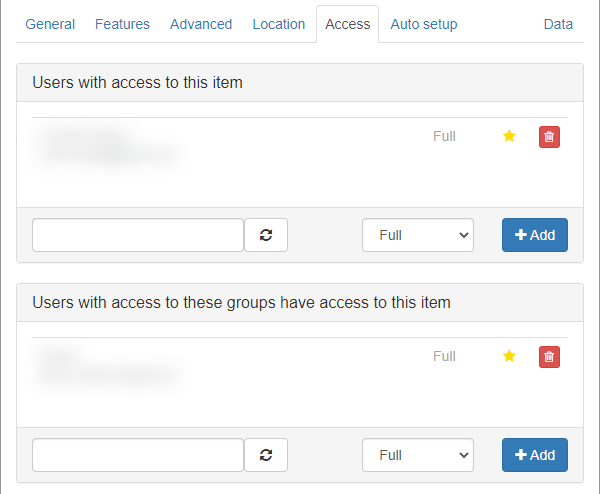
Grant additional users and user groups to access to the user and set the access control level. If another user has full access to a user they will be able to masquerade as the user and see all item that user has access to.
Users with access to this item
Enter a valid email address, select the access control level, then click Add.
- Full — The user will have full access to the item.
- Read only — The user can only view the item.
Users with access to these groups have access to this item
Enter a valid group name, select the access control level, then click Add.
- Full — Users with access to the selected group have full access to the item.
- Read only — Users with access to the selected group can view the item but not control it.
- Low vis — Users with access to the selected group will not see the item displayed in the full list of items. This can help speed up performance when there are a lot of items. For more information see Low visibility access controls.
Click the Delete button ( ) button to remove a user or group from the user item.
Auto setup
This tab is available only when creating a new user. The options on the Auto setup tab speed up the process of configuring the end user by automatically creating a sequence and screen.
Data
Add custom data to the user item. The data may be used in condition evaluation or to store any additional information required.